Cancel Dating App Subscription: Billing Provider Guide
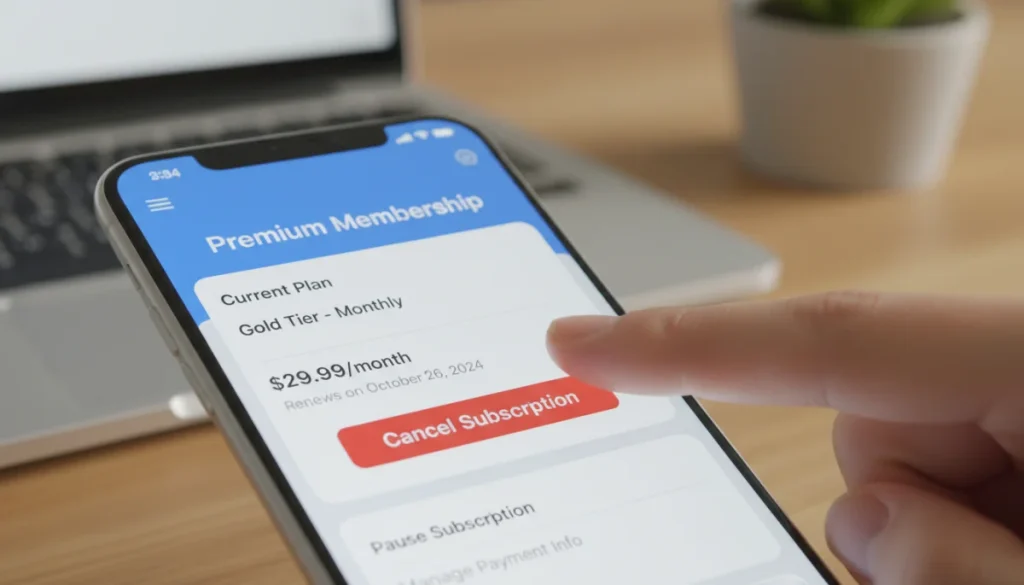
To effectively cancel a dating app subscription, you must first identify your billing provider—Apple App Store, Google Play Store, or the app directly—and then follow their specific cancellation protocol to stop recurring charges.
Navigating the world of online dating can be exciting, but managing subscriptions can sometimes feel like a puzzle. Understanding how to cancel a dating app subscription through the correct billing provider is crucial to avoid unwanted charges and ensure a smooth exit when you’re ready to move on. This guide will walk you through the essential steps.
Understanding Your Billing Provider
Before you can successfully cancel a dating app subscription, the very first step is to identify who is actually billing you. This might seem straightforward, but many users overlook this critical detail, leading to frustration when their cancellation attempts fail. Your billing provider dictates the exact steps you need to take to stop recurring payments.
Most dating app subscriptions are processed through major app stores, namely the Apple App Store for iOS devices and the Google Play Store for Android devices. However, some apps, particularly those with a strong web presence or direct-to-consumer models, might bill you directly. Knowing this distinction is paramount for a seamless cancellation process.
Apple App Store Subscriptions
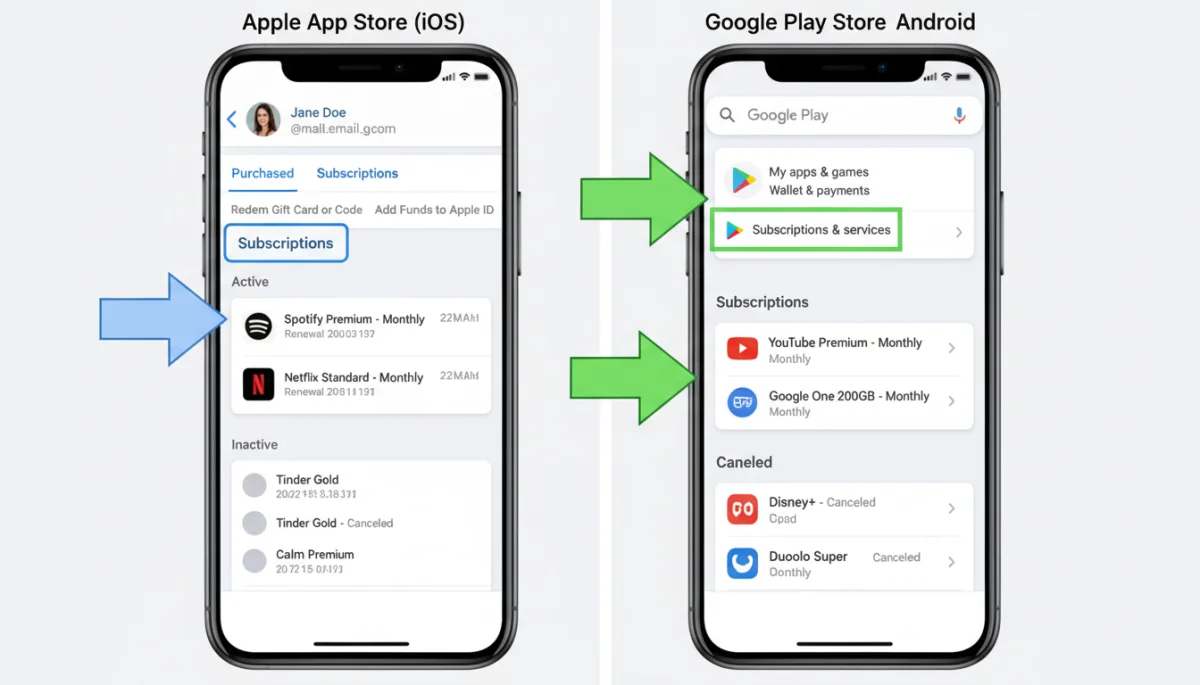
If you subscribed to a dating app using an iPhone or iPad, chances are your subscription is managed through your Apple ID. Apple provides a centralized hub for all subscriptions linked to your account, making it relatively easy to review and cancel services.
- Access Settings: Open the ‘Settings’ app on your iOS device.
- Tap Your Name: Select your name at the very top of the settings menu.
- Subscriptions: Tap ‘Subscriptions’ and authenticate with Face ID, Touch ID, or your passcode.
- Manage App: Find the dating app in question, tap on it, and then select ‘Cancel Subscription’.
It’s important to remember that deleting the app from your device does not automatically cancel the subscription. You must follow these steps to ensure the recurring charges are stopped. Apple’s system is designed to give users clear control over their digital purchases.
Google Play Store Subscriptions
For Android users, the Google Play Store acts as the central billing authority for most in-app subscriptions. Similar to Apple, Google offers a straightforward method to manage all your active subscriptions in one place, ensuring you don’t get charged for services you no longer use.
- Open Play Store: Launch the Google Play Store app on your Android device.
- Menu Access: Tap your profile icon (usually top right), then select ‘Payments & subscriptions’.
- Subscriptions: Tap ‘Subscriptions’ to see a list of all active services.
- Cancel App: Locate the dating app, tap on it, and then choose ‘Cancel subscription’.
Just like with iOS, simply uninstalling an app from your Android device will not terminate the subscription. You must go through the Google Play Store’s subscription management interface to complete the cancellation correctly. This ensures that the billing cycle is properly interrupted.
In conclusion, the initial step to cancel any dating app subscription is to accurately determine whether Apple or Google Play is handling the billing. This distinction will direct you to the correct platform where you can manage and ultimately terminate your subscription effectively.
Direct Billing: When Apps Bill You Directly
While most dating apps utilize Apple or Google Play for subscription management, there are instances where an app might bill you directly. This usually happens if you subscribed through the app’s website using a credit card or PayPal, bypassing the app store ecosystems. Recognizing this scenario is vital, as the cancellation process will differ significantly.
Direct billing is less common for initial sign-ups directly within the app on a mobile device, but it’s prevalent if you’ve ever upgraded your membership via a desktop browser or a specific promotional link. Always check your bank statements or email receipts for clues if you’re unsure about your billing source.
Identifying Direct Subscriptions
To confirm if you’re being billed directly, review your financial statements. Look for charges that do not explicitly mention ‘Apple’ or ‘Google Play’. Instead, they might list the dating app’s name directly or a third-party payment processor used by the app. Checking your email for subscription confirmation emails is also a good strategy, as these often specify the billing method.
Once you’ve confirmed direct billing, the cancellation process will typically involve interacting directly with the dating app’s platform. This usually means logging into your account on their website or within the app itself, navigating to your profile or settings, and finding a section related to ‘Subscriptions’ or ‘Account Management’.
Steps for Direct Cancellation
The exact steps can vary slightly from app to app, but the general procedure for canceling a directly billed subscription is as follows:
- Log In: Access your dating app account, preferably through their official website, as web interfaces often offer more comprehensive account management options than mobile apps.
- Navigate to Settings: Look for a ‘Settings’, ‘Account’, ‘Profile’, or ‘Subscription’ tab. This is usually found by clicking on your profile picture or an icon in the corner of the screen.
- Find Subscription Details: Within this section, locate your current subscription status and options. There should be a clear button or link to ‘Manage Subscription’ or ‘Cancel Subscription’.
- Confirm Cancellation: Follow the prompts to confirm your cancellation. You might be asked for a reason for canceling or offered incentives to stay. Ensure you complete all steps until you receive a confirmation that your subscription has been terminated.
Always save any confirmation emails or screenshots of the cancellation process as proof. This can be invaluable if any billing disputes arise later. Direct billing requires direct action with the app provider, so bypassing Apple or Google Play is necessary.
In summary, if your dating app subscription doesn’t appear in your Apple or Google Play accounts, you’re likely being billed directly. This necessitates logging into the app’s own platform, usually its website, to manage and cancel your subscription effectively.
Common Pitfalls and How to Avoid Them
Canceling a dating app subscription can sometimes be trickier than it seems, primarily due to common misconceptions and oversights. Many users encounter issues because they misunderstand how subscriptions work across different platforms or fail to follow through with all necessary steps. Being aware of these pitfalls can save you time, money, and frustration.
One of the most frequent mistakes is assuming that deleting the app from your phone automatically cancels the subscription. This is a critical error, as subscriptions are typically tied to your account within the app store or directly with the service, not to the app’s presence on your device. The app might be gone, but the billing continues.
Forgetting Which Account is Linked
Another common issue arises when users have multiple Apple IDs or Google accounts. If you subscribed using one account but are checking another, you won’t find the active subscription. Always ensure you are logged into the correct account that was used for the original purchase. This might require checking old email addresses or reviewing past purchase history.
Ignoring Confirmation Emails
When you subscribe to a dating app, you almost always receive a confirmation email. This email is a treasure trove of information, often detailing the subscription terms, renewal dates, and crucially, instructions on how to manage or cancel your subscription. Many users overlook these emails, only to realize later that they contained the exact information they needed.
Similarly, after initiating a cancellation, always look for a cancellation confirmation email. This email serves as proof that your request was processed. Without it, your cancellation might not have gone through, and you could continue to be charged. Keep these emails in a dedicated folder for easy access if any issues arise.
Not Checking Renewal Dates
Dating app subscriptions often renew automatically. If you cancel just a day or two before the renewal date, you might still be charged for the next period, as some platforms require a certain lead time for cancellations to take effect. Always check your renewal date and aim to cancel several days in advance to be safe. This proactive approach prevents unexpected charges.
By understanding that deleting an app doesn’t cancel a subscription, using the correct account, saving confirmation emails, and being mindful of renewal dates, you can effectively avoid the most common pitfalls when trying to cancel a dating app subscription through the correct billing provider.
What to Do if You’re Still Being Charged
Even after following all the correct steps, some users occasionally find themselves still being charged for a dating app subscription they believed they had canceled. This can be incredibly frustrating, but there are clear actions you can take to resolve the situation. Persistence and documentation are key when dealing with erroneous charges.
The first and most important step is to gather all your evidence. This includes screenshots of the cancellation process, confirmation emails from the app or the billing provider (Apple/Google Play), and bank statements showing the unauthorized charges. Having a clear timeline and proof of your actions will strengthen your case significantly.
Contacting the Billing Provider First
If the charges are coming through Apple or Google Play, your first point of contact should be their respective support teams. They have direct access to your subscription history and billing information and are usually the most efficient at resolving these types of issues. Explain the situation clearly, providing all your documentation.
- Apple Support: Visit the Apple Support website, navigate to ‘Billing and Subscriptions’, and choose your preferred contact method (chat, phone, email).
- Google Play Support: Go to the Google Play Help Center, search for ‘subscriptions’, and find options to contact support for billing issues.
These platforms often have policies in place for refunds for erroneous charges, especially if you can prove you initiated a cancellation in a timely manner. Be polite but firm in your communication.
Contacting the Dating App Directly
If you were directly billed by the dating app, or if Apple/Google Play cannot resolve the issue, you’ll need to contact the dating app’s customer support. Most apps have a ‘Help’ or ‘Support’ section on their website or within the app itself. Look for FAQs or a ‘Contact Us’ link.
When contacting the app, provide your account details (username, email associated with the account), the dates of the charges, and any cancellation confirmations you have. Clearly state that you believe you are being incorrectly charged and request a refund and a definitive cessation of billing.
Disputing Charges with Your Bank
As a last resort, if neither the billing provider nor the dating app resolves the issue, you can dispute the charges with your bank or credit card company. This should only be done after you’ve exhausted all other avenues, as it can sometimes lead to your account being flagged or even suspended by the app or platform.
Provide your bank with all the documentation you’ve collected. They will initiate a chargeback process, which can take some time but is often effective in recovering funds for unauthorized transactions. This step underscores the importance of keeping detailed records of your cancellation attempts.
In summary, if you’re still being charged after canceling, systematically contact your billing provider (Apple/Google Play) or the dating app directly with all your evidence. If all else fails, a chargeback through your bank can be pursued, ensuring you are not unfairly billed.
Reactivating a Canceled Subscription (If You Change Your Mind)
Sometimes, after canceling a dating app subscription, you might have a change of heart. Perhaps you realized you missed certain features, or your circumstances changed, and you want to jump back into the dating pool with premium access. The good news is that reactivating a previously canceled subscription is usually a straightforward process, often simpler than the initial cancellation.
The method for reactivating depends on who your billing provider was when you originally subscribed. Generally, you’ll go back to the same place where you managed your cancellation, whether that’s the Apple App Store, Google Play Store, or directly within the dating app’s platform.
Reactivating via Apple App Store
If your original subscription was managed through your Apple ID, you can reactivate it by following these steps:
- Go to Settings: On your iOS device, open the ‘Settings’ app.
- Tap Your Name: Select your name at the top.
- Subscriptions: Tap ‘Subscriptions’.
- Find App: Locate the dating app in the ‘Expired’ or ‘Inactive’ section.
- Choose Plan: Tap on the app and then select the desired subscription plan to resubscribe.
Apple will prompt you to confirm the purchase using your Face ID, Touch ID, or passcode. Your subscription will then become active again, usually effective immediately or at the start of a new billing cycle, depending on the app’s policy.
Reactivating via Google Play Store
For subscriptions originally managed through the Google Play Store, the reactivation process is similar:
- Open Play Store: Launch the Google Play Store app.
- Access Menu: Tap your profile icon, then ‘Payments & subscriptions’, followed by ‘Subscriptions’.
- Locate App: Find the dating app in your list of inactive subscriptions.
- Resubscribe: Tap on the app and then select ‘Resubscribe’ or choose a new plan.
Google Play will guide you through confirming the payment details. Once confirmed, your subscription will be reinstated, allowing you to regain access to premium features. Always double-check the terms and pricing before confirming reactivation.
Reactivating Direct Subscriptions
If you had a direct subscription with the dating app, reactivation typically involves logging into your account on their website or within the app. Look for sections like ‘Upgrade’, ‘Premium’, ‘Subscription’, or ‘Account Settings’.
- Log In: Access your dating app account via their website or app.
- Navigate to Upgrade: Find the option to upgrade or resubscribe to a premium plan.
- Select Plan & Pay: Choose your desired plan and complete the payment process.
The app will usually process the payment immediately, and your premium features will be restored. Always ensure you are reactivating the correct plan and review the new billing cycle details. Reactivating a subscription is generally designed to be user-friendly, allowing you to quickly get back to enjoying the app’s full capabilities.
In summary, whether through Apple, Google Play, or directly with the app, reactivating a canceled dating app subscription typically involves revisiting the same platform where you initially managed it, making it a straightforward process should you decide to return.
Best Practices for Subscription Management
Effective management of your dating app subscriptions extends beyond just knowing how to cancel; it involves proactive habits that can save you money, time, and potential headaches. Adopting a few best practices ensures that you maintain control over your digital expenses and avoid unexpected charges.
One fundamental practice is to always keep track of where and how you subscribed to any service. This seemingly simple detail is often overlooked but is the most crucial piece of information when it comes to managing or canceling a subscription. A quick note in your calendar or a dedicated email folder can make a significant difference.
Reviewing Bank Statements Regularly
Make it a habit to regularly review your bank and credit card statements. This allows you to catch any unauthorized or forgotten charges early on. Many people only notice recurring payments months after they’ve started, making it harder to dispute them. Early detection is key to swift resolution.
Setting Calendar Reminders
For every subscription, especially those with annual or semi-annual billing cycles, set a calendar reminder a week or two before the renewal date. This gives you ample time to decide whether you want to continue the service or cancel it without being rushed. This proactive approach prevents unwanted automatic renewals.
Utilizing App Store Features
Both Apple and Google Play Stores offer robust subscription management dashboards. Familiarize yourself with these features. Regularly check the ‘Subscriptions’ section in your settings to see all active and expired services. This centralized view is an excellent way to keep tabs on everything you’re subscribed to through these platforms.
Reading Terms and Conditions
While often tedious, taking a few moments to read the terms and conditions, especially the billing and cancellation policies, can prevent many future issues. Pay close attention to automatic renewal clauses, notice periods for cancellation, and refund policies. Knowledge is power when it comes to managing subscriptions effectively.
By consistently reviewing your statements, setting reminders, using app store features, and understanding terms, you can confidently manage all your dating app subscriptions. These practices empower you to maintain control over your spending and ensure you’re only paying for services you actively use and value.
The Importance of Timely Cancellation
Timely cancellation of a dating app subscription isn’t just about saving money; it’s about exercising control over your digital life and preventing unnecessary financial burdens. Procrastinating or delaying the cancellation process can lead to a host of problems, from unwanted charges to difficulties in obtaining refunds.
Many subscription services, dating apps included, operate on an automatic renewal basis. This means that if you don’t cancel before your current billing cycle ends, your subscription will automatically renew, and you’ll be charged for another period, whether it’s a month, three months, or a year. This is why understanding your billing date is so critical.
Avoiding Unwanted Charges
The most immediate benefit of timely cancellation is avoiding unwanted charges. Even if you’ve stopped using the app, if the subscription is still active, you’ll continue to be billed. These small, recurring charges can add up over time, becoming a significant drain on your finances without you even realizing it until much later.
Simplifying Refund Processes
If you need a refund for an accidental or unwanted renewal, canceling promptly can strengthen your case. Most companies and app stores have stricter refund policies for subscriptions that have been active for an extended period or have been used significantly within the new billing cycle. A quick cancellation often makes the refund process smoother, if a refund is indeed granted.
Maintaining Financial Clarity
Managing numerous subscriptions can quickly become overwhelming. Timely cancellation helps maintain clarity over your financial commitments. By promptly canceling services you no longer use or need, you keep your financial landscape clean and can better track your spending, making budgeting easier and more accurate.
Preventing Account Issues
In some cases, prolonged inactivity on a paid subscription can lead to account issues or even data retention problems. While less common, ensuring your subscriptions are active only when you intend them to be can help streamline your digital presence and reduce potential complications down the line. It’s about being intentional with your digital footprint.
Ultimately, timely cancellation is a cornerstone of responsible subscription management. It protects your wallet, simplifies administrative tasks, and empowers you to make conscious decisions about where your money goes. Don’t underestimate the power of canceling a dating app subscription as soon as you’re certain you no longer need it.
| Key Point | Brief Description |
|---|---|
| Identify Billing Provider | Determine if Apple App Store, Google Play Store, or the app directly handles your subscription. |
| App Store Cancellation | Use device settings (iOS) or Play Store app (Android) to manage and cancel subscriptions. |
| Direct App Cancellation | Log in to the app’s website or account settings to cancel directly if billed by the app. |
| Avoid Common Pitfalls | Don’t delete the app without canceling; check correct accounts and save confirmations. |
Frequently Asked Questions About Dating App Subscriptions
Refund policies vary significantly by app and billing provider. Apple and Google Play often offer pro-rated refunds or allow you to use the service until the end of the current billing cycle without further charges. Direct billing apps might have stricter no-refund policies. Always check the specific terms and conditions or contact support.
No, deleting a dating app from your device does not automatically cancel your subscription. Subscriptions are tied to your account with the billing provider (Apple App Store, Google Play Store, or the app directly), not to the app’s presence on your phone. You must follow the specific cancellation steps outlined in this guide.
If you can’t find your subscription in the Apple App Store or Google Play Store, it’s highly likely you subscribed directly through the dating app’s website. In this case, you will need to log into your account on the app’s official website and manage your subscription from there, usually in the ‘Settings’ or ‘Account’ section.
After initiating a cancellation, always look for a confirmation email from the billing provider or the app. Additionally, check your subscription list in the Apple App Store or Google Play Store to ensure the app is listed as ‘Canceled’ or ‘Expired’. Regularly review your bank statements to confirm no further charges appear.
Some dating apps and billing platforms offer the option to pause a subscription, which temporarily stops billing and access without fully canceling. This feature varies by app and provider. Check the subscription management settings in your Apple App Store, Google Play Store, or directly within the dating app to see if a pause option is available for your specific service.
Conclusion
Successfully managing and canceling dating app subscriptions is a vital part of taking control of your digital finances and online presence. The key takeaway is to always identify your correct billing provider—whether it’s Apple, Google Play, or the app itself—as this dictates the precise steps you need to follow. By understanding these mechanisms, being proactive with your cancellation, and keeping good records, you can avoid frustrating charges and ensure a smooth exit from any dating service when the time is right. Remember, knowledge and timely action are your best tools in navigating the often-complex world of online subscriptions.
