How to Prepare Your Microphone and Camera for Video Calls
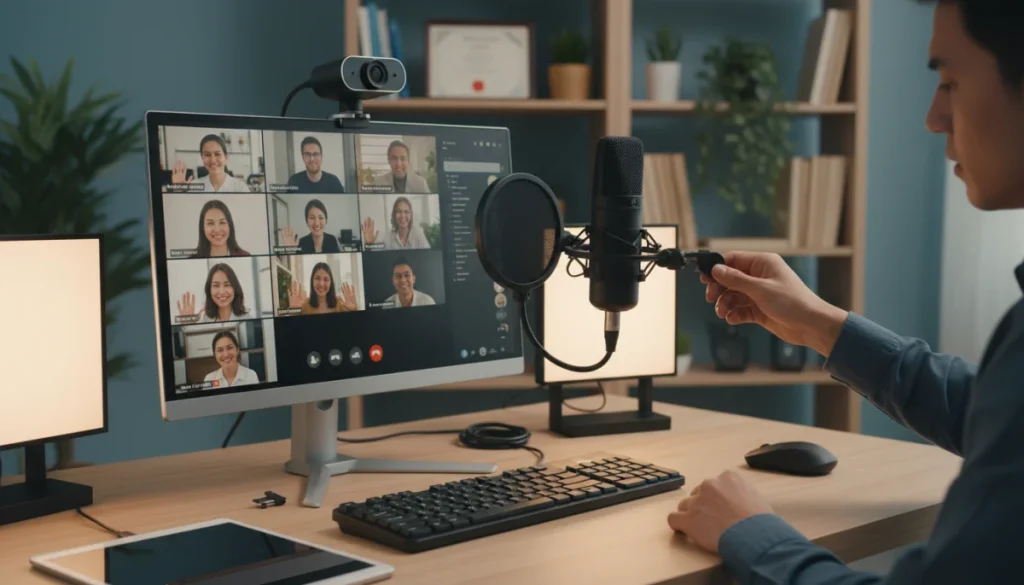
Optimizing your microphone and camera before a video call is crucial for clear communication and a professional appearance, ensuring effective virtual interactions and minimizing technical disruptions.
In today’s interconnected world, video calls have become an indispensable part of our daily lives, spanning from critical business meetings to casual family chats. However, the effectiveness of these virtual interactions hinges significantly on the quality of your audio and video. Learning how to prepare your microphone and camera before a video call is not just a technical chore; it’s a fundamental step towards ensuring clear communication, making a positive impression, and avoiding frustrating technical glitches. This comprehensive guide will walk you through every essential step to optimize your setup, transforming your video call experience from adequate to exceptional.
Understanding Your Equipment: Microphones and Cameras
Before diving into setup specifics, it’s vital to understand the basic types of microphones and cameras available and their implications for video calls. Not all equipment is created equal, and knowing the differences can significantly impact your preparation strategy. This section will introduce you to common devices and their general characteristics.
Microphones come in various forms, each suited for different environments and purposes. Built-in laptop microphones, while convenient, often pick up a lot of ambient noise and lack clarity. External USB microphones, like condenser or dynamic mics, offer superior sound quality, making your voice stand out. Similarly, cameras range from integrated laptop webcams to dedicated external webcams and even DSLR/mirrorless cameras, which can provide professional-grade video. Choosing the right tool for your needs is the first step in effective preparation.
Types of Microphones for Video Calls
The microphone you choose can dramatically affect how clearly you are heard. Understanding the pros and cons of each type helps in making an informed decision.
- Built-in Microphones: Convenient but generally offer lower sound quality, prone to picking up background noise.
- USB Microphones: Easy to set up, plug-and-play, and offer significantly better audio than built-in options. Excellent for most home office setups.
- Headset Microphones: Often integrated into headphones, these place the microphone close to your mouth, reducing ambient noise and improving voice isolation.
- Lavalier Microphones: Small, clip-on microphones that are discreet and good for isolating your voice, especially if you move around.
Selecting a microphone that matches your environment and budget is key. For most, a good quality USB microphone or a comfortable headset will provide excellent results. Consider where you will be taking calls and what level of noise cancellation you might need.
Camera Options for Optimal Video Quality
Your camera choice dictates the visual quality of your video calls. While integrated webcams are standard, upgrading can make a significant difference in your professional presentation.
- Integrated Webcams: Standard on most laptops, these are sufficient for basic calls but often lack resolution and low-light performance.
- External USB Webcams: Offer higher resolutions (1080p, 4K), better low-light performance, and often superior autofocus capabilities.
- DSLR/Mirrorless Cameras: For truly professional-grade video, these cameras can be connected via capture cards, providing exceptional image quality, depth of field, and flexibility.
When selecting a camera, consider the resolution you need, its low-light performance, and any additional features like automatic light correction or wide-angle lenses. A good external webcam is usually a solid investment for frequent video callers.
In conclusion, taking the time to understand your equipment, whether it’s the basics of a built-in mic and camera or an advanced external setup, forms the foundation for effective video call preparation. This knowledge allows you to anticipate potential issues and choose the right tools for a consistently clear and professional online presence.
Optimizing Your Audio Setup for Clarity
Crystal-clear audio is arguably more critical than video in a video call. If people can’t hear you, the message is lost, regardless of how good you look. This section focuses on practical steps to ensure your microphone delivers the best possible sound quality, minimizing distractions and maximizing intelligibility.
Proper microphone placement, software settings, and environmental considerations all play a role in achieving optimal audio. Even the most expensive microphone can sound terrible if not set up correctly. We will cover everything from physical positioning to digital adjustments to fine-tune your sound.
Microphone Placement and Environment
Where you place your microphone and the characteristics of your room significantly impact sound quality. A quiet environment is paramount.
- Proximity: Keep the microphone close to your mouth, ideally 6-12 inches away, to capture your voice clearly and reduce ambient noise.
- Pop Filter/Foam Cover: Use a pop filter or foam cover to minimize plosive sounds (p, b) and protect the microphone from moisture.
- Acoustics: Choose a room with soft furnishings (curtains, carpets, bookshelves) to absorb sound and reduce echo. Avoid highly reflective surfaces.
- Noise Reduction: Identify and eliminate sources of background noise like fans, air conditioners, or open windows before the call.
These physical adjustments are often the most impactful. A well-placed microphone in a quiet room can outperform a high-end mic in a noisy, echoey environment.
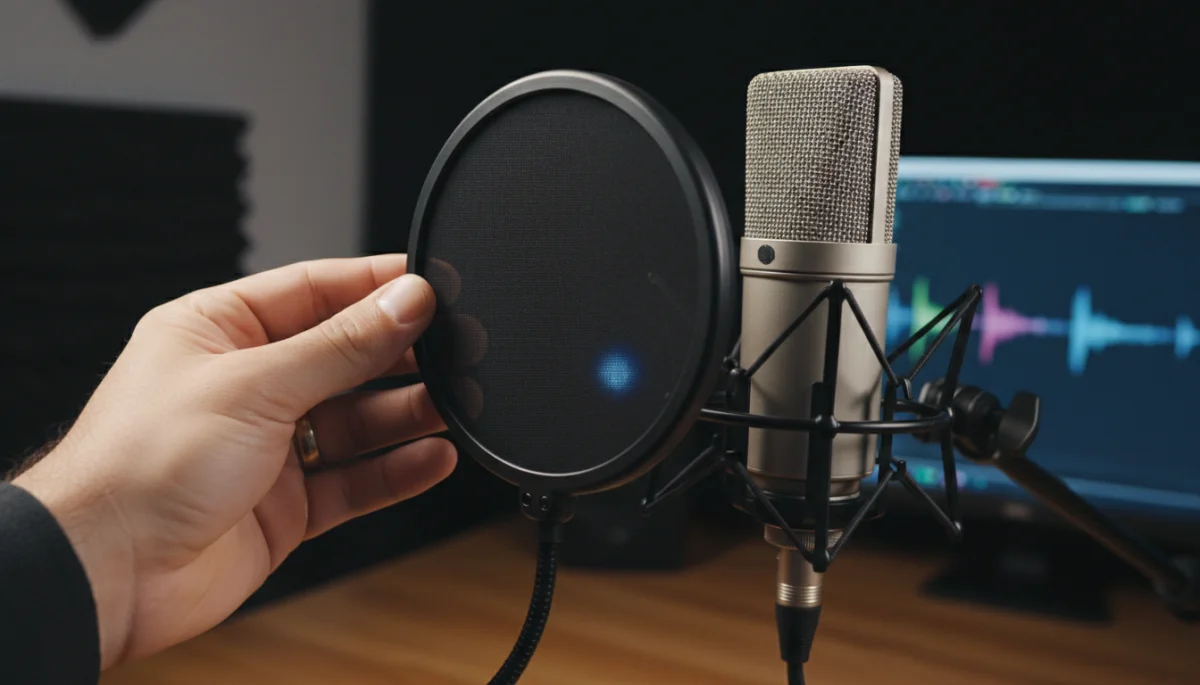
Beyond physical placement, software settings are crucial. Most operating systems and video conferencing applications offer microphone settings that you can adjust. Access your system’s sound settings to select the correct microphone input. Ensure the input volume is set appropriately – not too high to cause distortion, and not too low to be inaudible. Many applications also feature built-in noise suppression and echo cancellation; experiment with these to find the optimal balance for your environment. Testing your microphone before each call using the platform’s test features or a simple recording app is a non-negotiable step to catch any issues early.
Additionally, consider your speaking habits. Speak clearly and consistently into the microphone. Avoid turning your head away while speaking, as this can cause your voice to fade in and out. If you’re using a headset, ensure the microphone boom is positioned correctly, typically near the corner of your mouth, not directly in front of it, to avoid breathing sounds. By combining careful physical setup with precise software adjustments and mindful speaking, you can ensure your audio is always professional and clear, making your video calls much more effective and enjoyable for everyone involved.
Enhancing Your Video Presence with Camera Preparation
While audio clarity is foundational, a professional and engaging visual presence significantly elevates your video call experience. Preparing your camera involves more than just plugging it in; it encompasses lighting, background, and camera settings to present you in the best possible light. This section will guide you through optimizing your visual setup.
A well-composed and properly lit video feed not only makes you look more professional but also helps convey your expressions and engagement, fostering better connection with other participants. We’ll explore how to leverage natural and artificial light, curate your background, and fine-tune your camera’s software settings for a polished look.
Lighting Techniques for a Flattering Look
Good lighting can transform your video quality, making you look more vibrant and professional. Poor lighting, conversely, can make you appear shadowy or washed out.
- Frontal Lighting: Position your primary light source in front of you, slightly above eye level. Natural light from a window is ideal.
- Avoid Backlighting: Do not have a bright window or light source directly behind you, as this will silhouette you.
- Soft Light: Use diffused light rather than harsh direct light. A lampshade or softbox can help.
- Three-Point Lighting (Advanced): For a more professional setup, consider a key light (main light), fill light (softens shadows), and backlight (separates you from the background).
Even without professional lighting equipment, simple adjustments like facing a window can make a dramatic difference. Experiment with different light sources in your room to find the most flattering setup.
Background and Framing Considerations
Your background is an extension of your professional image. A cluttered or distracting background can detract from your message.
- Clean and Tidy: Ensure your background is clean, organized, and free of clutter. A plain wall or a tastefully decorated space works best.
- Minimal Distractions: Remove any items that might draw attention away from you.
- Virtual Backgrounds: If your environment isn’t ideal, use your video conferencing software’s virtual background feature, but choose a professional and non-distracting image or blur effect.
- Framing: Position yourself so your head and shoulders are clearly visible, with some headroom above your head. Aim for the camera to be at eye level.
A thoughtful background communicates professionalism and respect for the meeting. Take a moment before each call to assess what is visible behind you.
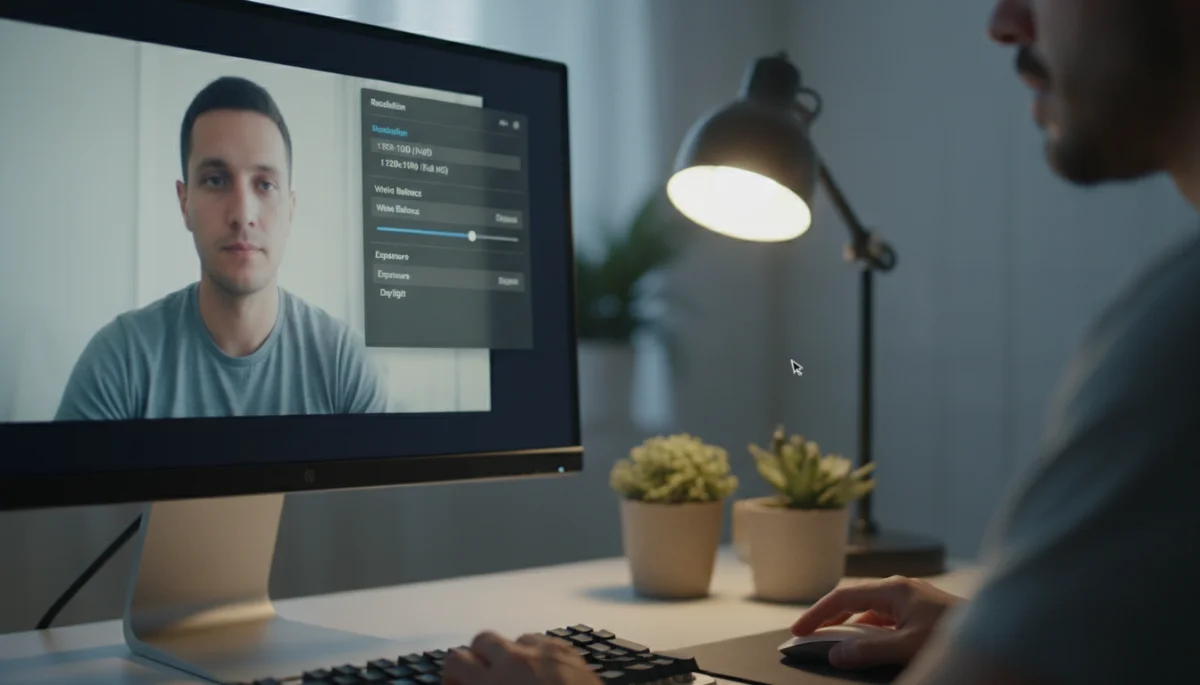
Once your physical environment and lighting are set, delve into your camera’s software settings. Most external webcams come with their own configuration software, and operating systems also offer basic camera controls. Adjust settings such as brightness, contrast, white balance, and exposure to ensure your skin tone looks natural and the overall image is well-exposed. If your camera has an autofocus feature, ensure it’s working correctly and focusing on your face. Some advanced cameras allow you to adjust the field of view; a narrower field of view can help eliminate distracting elements from your background. Always test your video feed before joining a call, using the preview function in your video conferencing application, to catch any last-minute adjustments. This holistic approach to camera preparation ensures you present a crisp, professional, and engaging visual presence, significantly enhancing your contribution to any video call.
Software Settings and Pre-Call Checks
Even with the best hardware, incorrect software settings can sabotage your video call. This section focuses on configuring your operating system and video conferencing application settings, along with crucial pre-call checks to ensure everything runs smoothly.
Proper software configuration ensures your chosen microphone and camera are recognized and utilized effectively. Moreover, a systematic pre-call checklist can prevent common technical issues, saving you from last-minute panic and ensuring a seamless start to your meeting.
Configuring Your Operating System and Application Settings
Your computer’s operating system and the video conferencing application both have settings that need attention.
- Select Correct Devices: In your operating system’s sound and camera settings, ensure your preferred microphone and camera are selected as default input devices.
- Application-Specific Settings: Within your video conferencing software (Zoom, Microsoft Teams, Google Meet, etc.), verify that the correct microphone and camera are chosen. These applications often override system defaults.
- Volume and Gain Control: Adjust microphone input volume in both system and application settings. Be mindful of microphone gain; too high can cause distortion, too low can make you inaudible.
- Video Resolution: Set your video resolution to an appropriate level. While higher resolutions look better, they require more bandwidth. 720p or 1080p is usually sufficient.
Familiarize yourself with where these settings are located in your frequently used applications. This will allow for quick adjustments if issues arise.
Essential Pre-Call Checklist
A quick checklist before each call can prevent many common technical headaches.
- Test Your Audio: Use the application’s built-in audio test feature or record a short clip of yourself speaking. Listen back to ensure clarity and appropriate volume.
- Test Your Video: Utilize the video preview option to check your framing, lighting, and background. Ensure your camera is working and focused.
- Check Internet Connection: A stable internet connection is vital for uninterrupted calls. Run a quick speed test if you suspect issues.
- Close Unnecessary Applications: Shut down any programs that might consume bandwidth or CPU, especially those using your camera or microphone.
- Notify Others: Inform family members or housemates that you’re on a call to minimize interruptions and noise.
Making these checks a routine practice ensures you’re always prepared. This proactive approach significantly reduces the likelihood of technical difficulties during your video calls, allowing you to focus on the conversation at hand rather than troubleshooting.
Troubleshooting Common Microphone and Camera Issues
Even with thorough preparation, technical glitches can sometimes occur. Knowing how to quickly troubleshoot common microphone and camera problems can save a video call from disaster. This section provides solutions for frequently encountered issues, enabling you to swiftly resolve problems and get back to your conversation.
From a microphone not being detected to a grainy camera feed, these problems often have straightforward solutions. Developing a systematic approach to troubleshooting will help you identify and fix issues efficiently, minimizing disruption and stress during important calls.
Microphone Not Working or Poor Audio Quality
Audio issues are among the most common and frustrating problems during video calls. Here’s a troubleshooting guide:
- Check Connections: Ensure your microphone is securely plugged in. If it’s a USB device, try a different USB port.
- Verify Device Selection: Double-check that the correct microphone is selected in both your operating system’s sound settings and the video conferencing application.
- Adjust Volume/Gain: Ensure the microphone input volume isn’t muted or set too low. Increase gain cautiously to avoid distortion.
- Restart Application/Computer: Sometimes, a simple restart of the video conferencing application or even your computer can resolve driver conflicts.
- Driver Updates: Ensure your microphone drivers are up to date. Check the manufacturer’s website for the latest software.
- Test with Another Application: Try using your microphone with a different application (e.g., a voice recorder) to determine if the issue is application-specific or system-wide.
Often, the solution is as simple as ensuring the right device is selected or unmuting a setting. A systematic check of these points can quickly pinpoint the problem.
Camera Not Detected or Poor Video Quality
Video problems can range from a completely black screen to a blurry or pixelated image. Addressing these issues promptly is crucial for maintaining a professional presence.
- Check Connections: For external webcams, ensure the USB cable is securely connected to both the camera and your computer. Try a different USB port.
- Device Selection: Confirm that the correct camera is chosen in your video conferencing application’s video settings and your operating system’s camera privacy settings.
- Camera Privacy Settings: Modern operating systems have privacy settings that can block camera access for applications. Ensure your video conferencing app has permission.
- Restart Application/Computer: As with audio, a quick restart can often clear up camera detection issues.
- Driver Updates: Outdated camera drivers can cause problems. Visit your camera manufacturer’s website to download and install the latest drivers.
- Check Lighting: Poor lighting is a primary cause of grainy or dark video. Ensure sufficient frontal lighting.
- Close Competing Applications: Make sure no other applications are trying to use your camera simultaneously.
Troubleshooting requires patience and a methodical approach. By systematically checking connections, settings, and drivers, you can resolve most common microphone and camera issues, ensuring your video calls proceed without unnecessary interruption. Having a backup plan, like using your phone for audio or video if your primary device fails, is also a wise precaution.
Advanced Tips for Professional Video Calls
Beyond the basics of setting up your microphone and camera, a few advanced considerations can significantly elevate the professionalism and effectiveness of your video calls. These tips focus on fine-tuning your presentation, optimizing your environment, and leveraging technology for a superior virtual experience.
Moving beyond just “making it work,” these strategies aim to create an impression of polish and preparedness. From investing in better gear to understanding the nuances of virtual etiquette, these advanced tips can help you stand out in any online interaction.
Investing in Quality Equipment
While not always necessary, investing in higher-quality gear can provide a noticeable upgrade to your video call presence.
- Dedicated Webcam: A good external webcam (e.g., Logitech C920 series or similar) offers better resolution, low-light performance, and autofocus than most built-in laptop cameras.
- USB Condenser Microphone: Microphones like the Blue Yeti or Rode NT-USB Mini provide studio-quality sound, making your voice rich and clear.
- LED Ring Light: A small ring light can provide consistent, flattering frontal lighting, especially useful in less-than-ideal room lighting conditions.
- Quality Headphones: Using closed-back headphones prevents your microphone from picking up audio from your speakers, eliminating echo for other participants.
These investments pay off over time, especially for those who frequently participate in important video calls. They offer reliability and a consistent, high-quality output.
Optimizing Your Network and Software
Even the best equipment can be hampered by a poor internet connection or unoptimized software. Ensuring your network is robust and your software is up-to-date is crucial.
- Wired Connection: Whenever possible, use an Ethernet cable to connect your computer directly to your router. This provides a more stable and faster connection than Wi-Fi.
- Prioritize Bandwidth: If others are using your network, ask them to pause high-bandwidth activities (e.g., streaming 4K video, large downloads) during your call.
- Update Software: Keep your operating system, webcam drivers, and video conferencing applications updated. Updates often include performance improvements and bug fixes.
- Learn Hotkeys: Familiarize yourself with keyboard shortcuts for muting your mic, turning off your camera, or raising your hand. This allows for quicker, smoother interactions.
These technical optimizations ensure that your high-quality audio and video can be transmitted without interruption, providing a seamless experience for all participants.
Furthermore, consider the psychological aspects of your virtual presence. Maintain good posture, make eye contact with your camera (not just the screen), and be mindful of your non-verbal cues. Practice active listening, and avoid multitasking during calls. These subtle behaviors, combined with your perfectly prepared microphone and camera, contribute to an overall professional and engaging presence, making your video calls more productive and impactful. Mastering these advanced tips moves you from merely participating in video calls to truly excelling in them, leaving a lasting positive impression.
Maintaining Your Setup and Best Practices
Consistent high-quality video calls aren’t just about initial setup; they require ongoing maintenance and adherence to best practices. This section covers how to keep your equipment in top condition and develop habits that ensure every video call is as smooth and professional as the last.
Regular checks, cleanliness, and thoughtful interaction strategies are key to sustained success. By integrating these practices into your routine, you can minimize surprises and consistently present your best self in the virtual realm, reinforcing the effort you put into learning how to prepare your microphone and camera before a video call.
Regular Maintenance for Your Equipment
Just like any other technology, your microphone and camera benefit from regular care.
- Clean Lenses and Microphones: Gently wipe your camera lens with a microfiber cloth to remove dust and smudges. For microphones, ensure any pop filters or foam covers are clean and free of debris.
- Cable Management: Keep cables organized and untangled to prevent damage and ensure reliable connections.
- Software Updates: Regularly check for and install updates for your camera and microphone drivers, as well as your operating system and video conferencing applications.
- Storage: When not in use, store external equipment safely to protect it from dust and physical damage.
These simple maintenance steps prolong the life of your equipment and help prevent unexpected issues during crucial calls.
Developing Effective Video Call Habits
Beyond the technical aspects, your behavior and habits during a video call significantly contribute to its success and your professional image.
- Always Test: Make a habit of performing a quick audio and video test before every important call.
- Mute When Not Speaking: This is a fundamental etiquette rule that prevents background noise from disrupting the call.
- Use Headphones: As mentioned, headphones prevent echo and improve your listening experience.
- Be Present: Avoid multitasking. Give your full attention to the call participants.
- Dress Appropriately: Your attire should match the formality of the call, even if you’re only visible from the waist up.
- Stay Hydrated: Keep a glass of water nearby, especially for longer calls, to maintain your voice clarity.
These habits, when consistently applied, create a positive and respectful environment for all participants. They demonstrate your professionalism and preparedness, making your contributions more impactful. By combining diligent equipment maintenance with thoughtful interaction strategies, you ensure that every video call is a smooth, productive, and professional experience, solidifying your reputation as a reliable and competent virtual communicator.
| Key Preparation Step | Brief Description |
|---|---|
| Audio Optimization | Ensure clear sound by proper microphone placement, noise reduction, and software settings adjustment. |
| Video Enhancement | Improve visual quality through good lighting, a tidy background, and correct camera settings. |
| Pre-Call Checks | Always test microphone, camera, and internet connection before joining any video call. |
| Troubleshooting | Understand common issues and solutions for quick fixes during unexpected technical difficulties. |
Frequently Asked Questions About Video Call Preparation
The most important factor for clear audio is microphone proximity to your mouth, combined with a quiet environment. Keeping your microphone close minimizes background noise and ensures your voice is the primary sound captured, making you easily understandable to other participants on the call.
You can significantly improve video lighting by positioning yourself facing a window during daylight hours. Natural light provides soft, even illumination that is very flattering. Avoid having a bright light source directly behind you, as this will create a silhouette effect.
For better audio quality and to minimize background noise, an external microphone is almost always superior to a laptop’s built-in option. USB microphones or headset microphones offer clearer sound, making your voice more prominent and professional during video calls.
Essential pre-call checks include testing your microphone’s audio output and your camera’s video feed using the video conferencing application’s preview features. Also, ensure your internet connection is stable and close any unnecessary applications to free up bandwidth and processing power.
Your background significantly impacts professionalism by either reinforcing your image or creating distractions. A clean, organized, and uncluttered background helps maintain focus on you, while a busy or messy one can detract from your message and appear unprofessional to other participants.
Conclusion
Mastering how to prepare your microphone and camera before a video call is a crucial skill in today’s digital landscape. By systematically addressing your equipment, optimizing software settings, and adopting consistent best practices, you can transform your virtual presence from merely functional to genuinely professional. The effort invested in ensuring clear audio and crisp video not only enhances your personal brand but also fosters more effective and engaging communication with colleagues, clients, and loved ones. Remember, a well-prepared setup minimizes technical disruptions, allowing you to focus on the conversation and make a lasting, positive impression every time you go live.
