How to Share Your Screen Without Showing Private Notifications
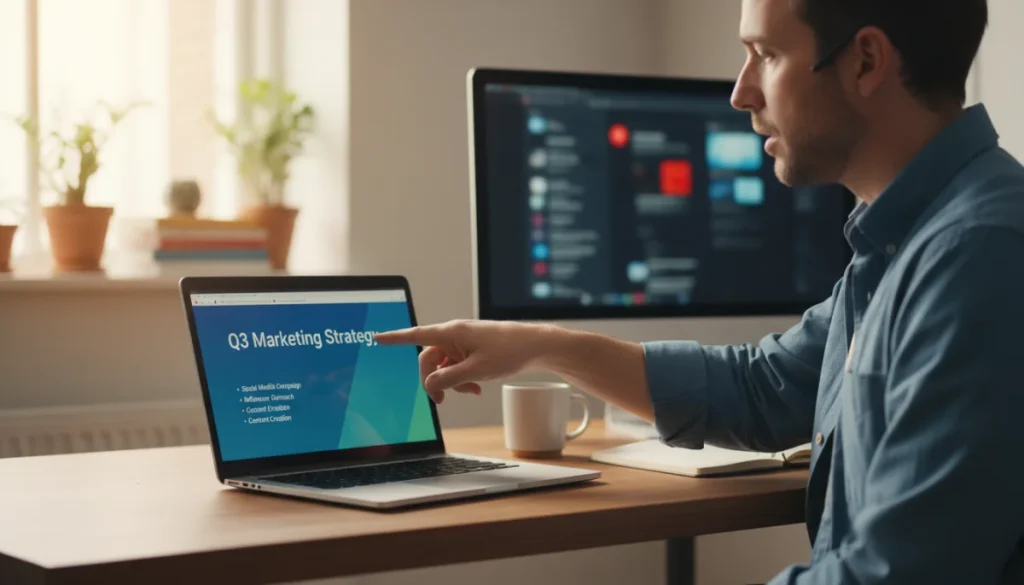
Effectively sharing your screen during video calls while maintaining privacy requires disabling notifications, managing open applications, and utilizing dedicated software features to prevent accidental exposure of personal information.
In today’s interconnected world, video calls and screen sharing have become indispensable tools for work, education, and social interaction. However, the convenience of sharing your desktop often comes with the risk of inadvertently exposing private information. Learning how to share your screen without showing private notifications is crucial for maintaining professionalism and safeguarding your personal data.
Understanding the Risks of Unprotected Screen Sharing
Screen sharing, while incredibly useful for collaboration and presentations, carries inherent risks if not handled carefully. The primary concern revolves around the accidental display of sensitive information that pops up on your screen. This could range from personal messages to confidential emails or even banking alerts, all of which can appear without warning during a live share.
Many users overlook the potential for these digital intrusions, leading to embarrassing or even damaging situations. The dynamic nature of operating systems means notifications can appear from various sources, including messaging apps, email clients, system updates, and even news alerts. These interruptions, while seemingly minor, can disrupt presentations, undermine credibility, and compromise privacy.
Common Privacy Pitfalls
Several common scenarios highlight the need for careful preparation before sharing your screen. These often stem from a lack of awareness about how different applications behave during a screen share.
- Messaging App Pop-ups: A private chat message appearing on screen during a professional meeting.
- Email Previews: A confidential email subject line or sender visible in a notification banner.
- Calendar Reminders: Personal appointments or sensitive meeting details flashing across the screen.
- System Alerts: Security warnings or software update prompts that might reveal system vulnerabilities.
Understanding these risks is the first step toward implementing effective strategies. It’s not just about what you intentionally show, but what your computer might inadvertently reveal. The goal is to create a controlled sharing environment where only the intended content is visible, protecting both your privacy and your professional image.
In essence, unprotected screen sharing can turn a routine task into a privacy nightmare. Being proactive about managing your digital environment before initiating a share is paramount. This involves a combination of system settings adjustments, application management, and mindful practice to ensure a smooth and secure sharing experience.
Disabling Notifications Across Operating Systems
One of the most effective ways to prevent private notifications from appearing during a screen share is to disable them entirely or use dedicated focus modes. Modern operating systems offer robust features designed to manage notifications, providing users with granular control over what appears on their screen and when.
Whether you are using Windows, macOS, or even a mobile operating system for sharing, there are specific steps you can take to silence those intrusive alerts. Familiarizing yourself with these settings is a fundamental aspect of learning how to share your screen without showing private notifications.
Windows Notification Management
For Windows users, the ‘Focus Assist’ feature (formerly ‘Quiet Hours’) is your best friend. It allows you to suppress notifications automatically or manually. Activating it before a screen share can save you from unexpected pop-ups.
- Access Focus Assist: Go to ‘Settings’ > ‘System’ > ‘Focus Assist’.
- Choose a Mode: Select ‘Alarms only’ or ‘Priority only’ to filter notifications.
- Manual Activation: You can also quickly toggle Focus Assist on or off from the Action Center (bottom-right corner of the taskbar).
- App-Specific Settings: For more control, go to ‘Settings’ > ‘System’ > ‘Notifications & actions’ to disable notifications for specific apps.
macOS Do Not Disturb
macOS offers a similar feature called ‘Do Not Disturb’, which can be configured to activate during specific times or when certain conditions are met, such as when mirroring to a TV or projector. This is invaluable for screen sharing scenarios.
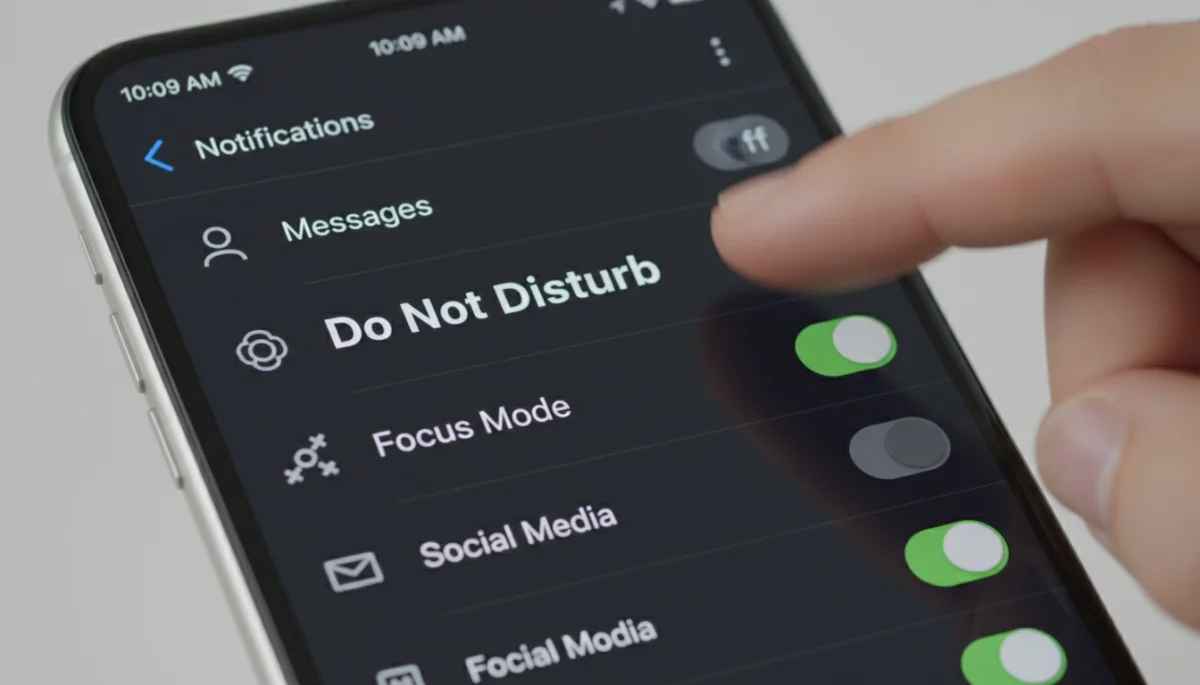
- Enable Do Not Disturb: Click the Control Center icon in the menu bar, then click ‘Focus’, and select ‘Do Not Disturb’.
- Schedule DND: In ‘System Settings’ > ‘Focus’ > ‘Do Not Disturb’, you can set schedules or activate it automatically.
- Customize Notifications: You can also customize which apps are allowed to send notifications even when Do Not Disturb is active, though for screen sharing, it’s safer to silence all.
By proactively managing these system-level settings, you create a digital environment that is less prone to unexpected interruptions. This ensures that your audience remains focused on your shared content, and your private life remains, well, private. Regularly reviewing and adjusting these settings is a good habit, especially if you frequently engage in screen sharing.
Utilizing Specific Window or Application Sharing
Beyond disabling notifications, a critical technique for maintaining privacy during screen sharing is to share only a specific window or application, rather than your entire desktop. Most video conferencing platforms, such as Zoom, Microsoft Teams, Google Meet, and Webex, offer this functionality, and it’s a feature you should always leverage.
When you choose to share a specific window, only the content within that particular application or window becomes visible to your audience. Everything else on your desktop – including your taskbar, other open applications, and any pop-up notifications – remains hidden. This provides a robust layer of privacy and control, ensuring that your audience sees exactly what you intend them to see, and nothing more.
How Specific Window Sharing Works
The process for selecting a specific window or application varies slightly between platforms, but the underlying principle is the same. After clicking the ‘Share Screen’ button, you’re usually presented with options:
- Entire Screen/Desktop: Shares everything on your monitor. This is generally not recommended for privacy-sensitive situations.
- Specific Window: Allows you to select one open application window (e.g., a PowerPoint presentation, a web browser, a Word document).
- Specific Application: Similar to window sharing, but often groups all windows of a particular application together.
Always opt for the ‘Specific Window’ or ‘Specific Application’ choice. This method is foolproof in preventing accidental notification exposure because the shared content is confined to a single, controlled frame. Even if a notification pops up on your desktop, it will not appear on the shared window.
It’s also good practice to close any unnecessary applications before starting your share. While specific window sharing hides them, having too many background processes can slow down your computer and potentially impact the quality of your screen share. This simple preparation step enhances both privacy and performance.
Mastering specific window sharing is a cornerstone of professional and private screen sharing. It offers unparalleled control over your shared content, effectively isolating your presentation from the rest of your digital environment. Always double-check your sharing selection before making your screen visible to others.
Managing Your Desktop Environment
Beyond software settings, preparing your physical and digital desktop environment is a crucial step in ensuring privacy during screen sharing. A cluttered desktop or an unorganized digital workspace can inadvertently lead to the exposure of private information, even if you’ve disabled notifications and opted for specific window sharing.
Think of your desktop as your public stage during a screen share. Anything visible on it, even momentarily, can be seen by your audience. Therefore, a proactive approach to decluttering and organizing your digital space before a call is highly recommended. This practice not only enhances privacy but also contributes to a more professional and focused presentation.
Decluttering Your Desktop
A desktop full of personal files, screenshots, or sensitive document shortcuts is a privacy risk. Before any screen sharing session:
- Clear the Desktop: Move all personal files, folders, and sensitive documents into a dedicated folder or another drive not visible on the desktop.
- Close Unnecessary Applications: Even if you’re sharing a specific window, having many applications running in the background can be distracting if you accidentally switch windows or if an application icon is visible in a taskbar.
- Minimize Personal Widgets: If you use desktop widgets that display personal information (e.g., weather with your location, sticky notes with private reminders), hide or close them.
Consider creating a ‘clean desktop’ profile or a temporary user account specifically for screen sharing if you frequently present sensitive information. This provides an almost entirely blank slate, minimizing any risk of exposure.
Furthermore, pay attention to your browser. If you’re sharing a web browser window, ensure that any tabs with personal accounts (like social media, personal email, or online banking) are closed. Browser extensions can also sometimes display notifications or badges that might reveal information. It’s wise to temporarily disable or close such extensions if they pose a risk.
By taking these steps to manage your desktop environment, you significantly reduce the chances of private information being inadvertently displayed. This preparation is a foundational element of learning how to share your screen without showing private notifications effectively and professionally.
Advanced Privacy Settings in Video Conferencing Tools
Modern video conferencing platforms have evolved to offer sophisticated privacy settings that go beyond basic notification management. These tools often include features specifically designed to enhance privacy during screen shares, allowing users to fine-tune their sharing experience. Understanding and utilizing these advanced options can provide an extra layer of security and professionalism.
Each platform has its own set of unique features, but common functionalities include the ability to pause screen sharing, annotate content without revealing underlying desktop elements, and even share only a portion of a window. Familiarizing yourself with these tool-specific capabilities is essential for anyone who regularly engages in screen sharing.
Platform-Specific Privacy Features
While the exact terminology and steps may differ, here’s a general overview of advanced privacy settings you might find:
- Pause Share: Most platforms offer a ‘Pause Share’ button. This is incredibly useful if you need to quickly check something on your desktop or respond to a private notification without stopping and restarting the entire sharing session. When paused, your audience sees a frozen image of your last shared content.
- Whiteboard Feature: Instead of sharing your screen, some platforms offer a built-in ‘whiteboard’ feature. This allows you to draw, write, and collaborate in a shared digital space without ever exposing your desktop.
- Content Only Sharing: Some tools allow you to share only the content of an application, completely hiding the application’s menu bars, toolbars, and any other interface elements that might reveal system information.
- Advanced Screen Region Sharing: A few platforms offer the ability to select a specific rectangular region of your screen to share, rather than a full window. This offers even more granular control, though it requires careful management to ensure all intended content remains within the shared region.
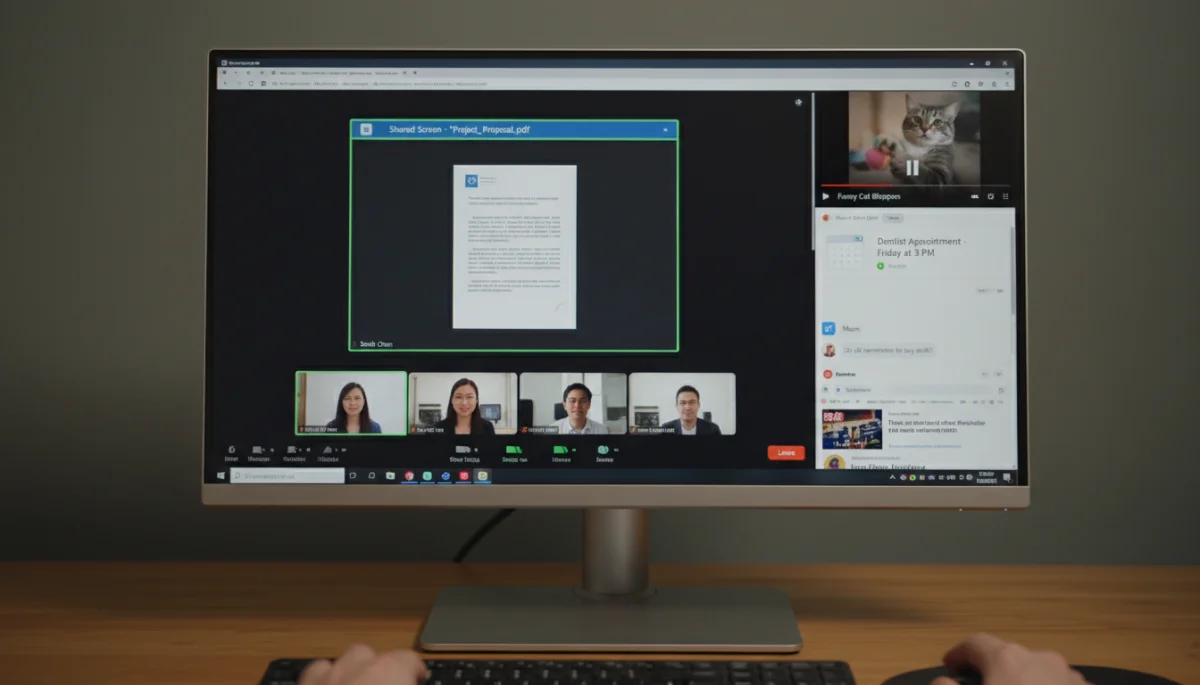
Before an important screen sharing session, take a few minutes to explore the specific settings available in your chosen video conferencing tool. Many platforms provide ‘test’ or ‘practice’ modes where you can experiment with these features without a live audience. This hands-on experience will build your confidence and ensure you can react quickly to unexpected situations.
Leveraging these advanced settings is a proactive step in mastering how to share your screen without showing private notifications. It demonstrates a commitment to professionalism and respect for the privacy of both yourself and your audience.
Best Practices for a Secure Screen Sharing Experience
Beyond technical configurations, adopting a set of best practices can significantly enhance the security and professionalism of your screen sharing sessions. These practices involve a combination of preparation, mindfulness during the call, and post-call review, ensuring a consistently secure experience. It’s about developing habits that prioritize privacy and prevent accidental exposure.
Integrating these habits into your routine will make screen sharing a seamless and stress-free process, allowing you to focus on your content rather than worrying about privacy breaches. These best practices are applicable whether you’re in a professional meeting, a casual chat with friends, or an educational session.
Pre-Call Checklist and During-Call Mindfulness
A simple checklist before each screen share can go a long way:
- Notification Check: Confirm that ‘Do Not Disturb’ or ‘Focus Assist’ is active.
- Desktop Cleanup: Ensure your desktop is clear of personal files and clutter.
- Close Unnecessary Apps: Shut down any applications not directly relevant to your presentation. This includes messaging apps, personal email clients, and social media.
- Prepare Content: Open all necessary documents, presentations, or web pages in advance and arrange them in the order you’ll present them. This minimizes fumbling and window switching.
- Test Run: If possible, do a quick test share with a colleague or friend to confirm everything looks as expected.
During the screen share, maintain a heightened sense of awareness. Avoid multitasking on your shared screen. If you need to access something private, use the ‘Pause Share’ feature or temporarily stop sharing. Always assume that whatever is on your shared screen is visible to everyone, even if you think you’re being quick.
Consider using a secondary monitor for personal communication or notes if available. This allows you to keep private information entirely separate from your shared screen. If you only have one monitor, be extra diligent about closing all non-essential applications.
Finally, remember to stop sharing your screen as soon as you are finished presenting. It’s a common oversight to leave your screen shared longer than necessary, increasing the window of opportunity for an accidental exposure. By following these best practices, you can confidently and securely share your screen without showing private notifications.
Troubleshooting Common Screen Sharing Issues
Even with the best preparation, occasional issues can arise during screen sharing. These might include unexpected notifications, technical glitches, or simply forgetting a privacy step. Knowing how to quickly troubleshoot these common problems can help you maintain composure and professionalism, even when things don’t go exactly as planned. Being prepared for the unexpected is part of mastering how to share your screen without showing private notifications.
The key to effective troubleshooting is to remain calm, identify the problem swiftly, and have a plan for immediate action. Most issues can be resolved with a few quick steps, allowing you to resume your presentation with minimal disruption.
Quick Fixes and Prevention Strategies
- Unexpected Notification Pop-up: If a notification appears despite your settings, immediately use the ‘Pause Share’ feature on your video conferencing tool, or quickly stop sharing. Address the notification, then resume sharing.
- Accidental Full-Screen Share: If you realize you’re sharing your entire desktop instead of a specific window, stop sharing immediately. Re-initiate the share, carefully selecting the correct window or application.
- Blurred or Low-Quality Share: While not a privacy issue, a poor-quality share can be distracting. Check your internet connection. If sharing a video, ensure your system resources aren’t being overtaxed by other applications. Some platforms allow you to optimize for video sharing.
- Audio Issues: Ensure your microphone and speaker settings are correctly configured within the video conferencing application. If sharing a video with audio, make sure the ‘Share computer sound’ option is enabled.
- Application Freezing: If the application you’re sharing freezes, try to close and reopen it. If the entire system becomes unresponsive, you might need to briefly stop sharing and restart the application or even your computer. Apologize for the interruption and explain the technical difficulty.
To prevent future issues, always perform a quick system check before a call. Ensure your operating system and video conferencing software are updated. Updates often include bug fixes and performance enhancements that can improve your sharing experience. Also, consider having a backup plan, such as a pre-recorded video or a shared document link, if live sharing becomes problematic.
By understanding these potential pitfalls and knowing how to react, you can ensure that your screen sharing sessions remain professional and private, even when technical challenges arise.
| Key Point | Brief Description |
|---|---|
| Disable Notifications | Use OS features like ‘Do Not Disturb’ or ‘Focus Assist’ to silence alerts during screen sharing. |
| Share Specific Window | Always choose to share only a particular application or window, not your entire desktop. |
| Clean Desktop | Clear personal files and close unnecessary apps before starting your screen share. |
| Utilize Platform Features | Leverage ‘Pause Share’ or whiteboard tools within your conferencing software for added control. |
Frequently Asked Questions About Screen Sharing Privacy
The most effective way is to activate ‘Do Not Disturb’ (macOS) or ‘Focus Assist’ (Windows) before sharing your screen. Additionally, close all messaging applications or ensure they are set not to display pop-up notifications or previews, even when silenced.
It is significantly safer to share a specific window or application. This prevents anything outside that chosen window, such as desktop icons, other open applications, or unexpected notifications, from being visible to your audience. Always opt for specific window sharing.
If a private notification appears, immediately use the ‘Pause Share’ feature in your video conferencing tool, or stop sharing your screen entirely. Address the notification quickly, then resume sharing when you are ready and the issue is resolved.
When sharing a specific window, your taskbar or dock is typically hidden. If you’re sharing your entire screen, you can often set your taskbar/dock to auto-hide in your operating system settings. Some conferencing tools might also offer options to hide these elements.
Most modern operating systems and video conferencing platforms include built-in features like ‘Do Not Disturb,’ ‘Focus Assist,’ and specific window sharing. Dedicated third-party tools are less common, as the native options are usually sufficient when properly configured and utilized.
Conclusion
Mastering how to share your screen without showing private notifications is an essential skill in today’s digital landscape. By proactively disabling notifications, strategically utilizing specific window sharing, managing your desktop environment, and leveraging advanced features within video conferencing platforms, you can ensure a professional and private sharing experience. These practices not only safeguard your personal information but also enhance the quality and focus of your presentations. Adopting a mindful approach and preparing thoroughly before each session will allow you to confidently engage in screen sharing without the worry of accidental disclosures, fostering trust and maintaining professionalism in all your virtual interactions.
